Home Services

How Drywall Installation Should Be Done Properly

Drywall is an essential construction material, but improper installation can lead to problems that require costly repair. To ensure a successful project, builders must balance cost with quality and precision.

Measuring framing spacing to determine the right drywall size makes for accurate cuts. A well-planned layout minimizes waste and reduces the number of seams. Click the Drywall Installation Naperville to learn more.

Whether you’re installing drywall in your home or doing a commercial project, proper preparation is key to a successful outcome. By assessing the space, gathering necessary tools and materials, installing blocking and electrical outlets, and protecting floors and surfaces, you can streamline the installation process and achieve professional results.

Start by measuring the space you need to cover and determining how much drywall you’ll need. Make sure you have a few extra sheets on hand for waste and cutting mistakes, and plan ahead by marking where any studs or electrical outlets will be located.

You should also decide whether you will hang the drywall horizontally or vertically. Horizontal installation helps prevent warping and bending and reduces the number of seams, while vertical installation is ideal for tall walls or when working alone. It’s also a good idea to stagger the seams where possible, as this will help reinforce the wall and conceal them later on.

Before you begin putting up the drywall, be sure to lay down tarps or drop cloths to protect your floors and furnishings from dust and debris. This will also help to make cleanup easier. It’s also a good idea for workers to wear masks, as drywall dust can irritate the nose and throat when inhaled.

The next step is to prep the drywall surface by smoothing and sanding it. Then, apply a primer to help seal the porous surface and prevent the formation of mold or other harmful substances. Finally, apply a high-quality drywall paint to provide a long-lasting finish.

Installing Blocking

If you’re hanging heavy objects, like cabinets or shelves, on your drywall, you should install blocking before beginning the installation process. This will add additional support to the drywall, helping it to resist warping and bending and ensuring that your fixtures are secure.

Before installing a corner bead, you should make sure it’s fastened securely to the drywall and firmly attached to the framing members. Once the bead is in place, you can apply a liberal amount of joint compound over it. Be sure to apply the compound evenly so that it looks consistent and free of blemishes.
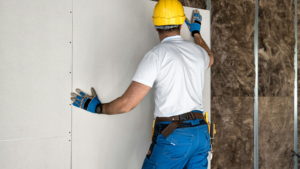
Hanging

Drywall is an ideal building material for home renovations and additions. It can be a DIY project, but the job requires time and effort to install properly. It’s best to hire a professional who can ensure that the project is completed correctly and on budget. Drywall installation costs include materials, labor, and other related expenses. It’s important to take the time to plan out the job and understand all of the steps involved.

First, measure and mark your drywall sheet to determine how much you need to cut. This will save you time when cutting, and it helps prevent mistakes. Then, lay the sheet on a flat surface and use a drywall saw to cut it along the marks. After the drywall is cut, you can begin installing it on the wall.

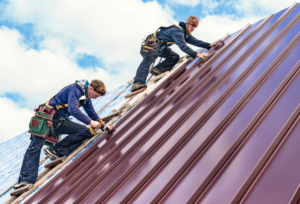
When hanging drywall, you should always screw each piece of wallboard to the framing using appropriate screws. Make sure that the heads of the screws are not recessed in the face paper and that they’re countersunk below the surface of the wallboard. This will help prevent cracks from forming as the wallboard expands and contracts.

Next, you need to cut out any necessary openings for doors, windows, and electrical outlets. You can use a drywall saw or a circular saw with a drywall blade. For large openings, you may need to use a drywall router.

Hanging drywall can be difficult, especially when working alone. It’s recommended that you have someone assist you with the process, as drywall sheets are heavy to lift. It’s also a good idea to label each panel with points of reference to help you identify the correct side to hang.

It’s also a good idea to stagger the seams in your wallboard. This will add strength to your walls and minimize the amount of patching required. It will also help make it easier to conceal any imperfections in your wallboard with paint and trim. You can use a tape measure to determine the distance between each joint. If you’re working on a commercial project, fire codes will require that all of the seams be vertical. For residential jobs, however, you can choose to hang the drywall horizontally instead.

Taping

Drywall installation is a process that requires attention to detail for a quality result. While hanging drywall is relatively straightforward, the finishing phases of mudding and taping take more skill and precision to get right. For this reason, a DIY homeowner might want to leave this step to a professional drywall specialist for the best results.

The type of tape used to seam drywall is important, and there are several different options available. The primary two choices are paper and mesh tape. Both have unique characteristics that make them better suited for different scenarios.

Paper drywall tape is inexpensive and easy to work with, making it ideal for standard seams. It is also a good choice for corners because it can be folded easily into and over them. It is non-adhesive, however, and must be embedded in a layer of joint compound before it will stick. It is also susceptible to wrinkling or bubbling if not applied carefully and with proper technique. Paper tape is not suitable for use in high-moisture areas as it can become weak when exposed to water.

Mesh drywall tape is composed of fiberglass threads that are both stronger and more durable than paper tape. It is resistant to mold, making it a better option for bathrooms or kitchens. It is also easier to work with than paper tape, and it has an open mesh structure that allows joint compound to penetrate and bond effectively. It can be purchased at most hardware stores and is a popular choice for professionals.

Regardless of the type of tape used, there are certain things all professionals should do to ensure that the finished product is top-notch. First and foremost, all professionals should adhere to safety protocols and wear personal protective equipment (PPE) throughout the project. This will ensure their own safety as well as the safety of others working on site.

Professionals should also keep a clean and organized work area, keeping tools, materials, and debris in a designated place at all times. This will minimize the risk of accidents and help to maintain a high level of professionalism.

Finishing

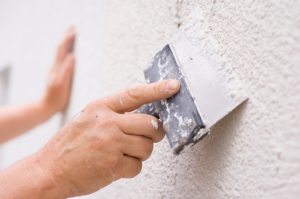
After you’ve taped and sanded your interior walls, the next step is to finish them so they’re ready for painting or wallpapering. Having the right tools for this can help you create a professional-looking wall. You’ll need putty knives, preferably in two sizes: a small one for getting into corners and a wider one for feathering out the compound. You’ll also need joint compound or mud, available premixed or in a bucket. It’s important to select the right type of mud for your project, as some can be used for ceilings while others are not.

The first step in finishing is to apply a skim coat. This is a very light layer of mud that’s designed to smooth out the surface for painting. It’s a good idea to mix water into the mud for easier application. You don’t want the mud to be too runny though, as this could expose the tape and lead to visible seams.

Once the mud has dried, you can apply more layers of mud as needed, always using a light touch to avoid exposing the tape. You’ll need to sand between coats, too, so make sure you’re using a fine-grit sandpaper.

When you’re ready to cut a piece of drywall, use a T-square and utility knife to score the front side of the sheet, at least 1/8” deep (Image 2). Then, push down on the backside with your knee, snapping it along the scored line. Be careful not to rip the paper backing.

Inside corners require a different technique, as they’re harder to reach with a blade. To create a clean, sharp corner, you can use a tool called a Trim-Tex Magic interior corner. This is much easier to use than taping and sanding, and it’ll give your walls a polished look.

While completing a drywall project on your own may seem daunting, it is possible to do if you follow the steps carefully and take your time. The rewards will be worth the effort, resulting in a finished wall that’s ready for painting or other decoration.

Home Services

How Does a Septic Tank Work?

When you flush the toilet, take a shower, wash dishes or use the washing machine, wastewater flows into septic tank pipes. These pipes lead to your septic system’s absorption or drain field where clean wastewater is dispersed into the soil.

Heavy solid waste sinks to the bottom of the septic tank and undergoes natural bacterial digestion to form sludge. Oils and grease float to the top, creating a layer of scum. Click the https://www.septictankarmadale.com.au/ to learn more.

A septic tank is an underground storage tank that holds wastewater from residential plumbing. It uses natural and technological processes to treat wastewater from showers, bathroom sinks, kitchen drains and laundry. After treatment, it disperses into the soil via a drainfield. Septic tanks are most commonly found in suburban and rural homes not connected to municipal sewer systems.

A water-tight, buried container, septic tanks are typically made from concrete or high-quality plastics like polyethylene. They are large enough to hold about 1,000 to 1,500 gallons of water. They have an inlet wastewater pipe and an outlet sewage pipe, both connected to a septic drain field. The inlet pipe is fitted with a baffle wall to direct raw wastewater downward toward the middle of the tank. This design reduces wastewater agitation, which makes it easier for solids to settle. The baffle also keeps surface scum from entering the inlet pipe.

During the settling process, septic tanks trap solid matter and sediment. The resulting sludge usually floats on top of the liquid wastewater. The wastewater is a clear liquid that microorganisms use to break down waste. The septic tank’s dividing walls and T-shaped outlet prevent sludge and scum from leaving the tank, but allow the liquid wastewater to exit through the outlet pipe.

When septic tanks are full, the sludge and scum may take up to 35% of the tank’s volume. A homeowner will know it’s time to have the tank pumped when this occurs.

If you’ve had a lot of rain recently, it’s possible your septic system is over-saturated. This condition can cause a buildup of mud in the drain field, which can lead to sewage back-up into your home. If this is the case, wait a few days to see if the ground dries out before calling a professional.

If your septic system is backed up and sewage is flowing into your house, it’s important to turn off all water in and around your home until the situation can be addressed. Never attempt to clear a backup yourself, as this can lead to toxic fumes or lack of oxygen, which are both dangerous.

How Does a Septic Tank Work?

A conventional septic system, the most common on-site wastewater treatment system, is a tank-and-soil absorption system that uses natural and mechanical processes to filter and treat household drain waste. Wastewater from sinks, toilets, bathtubs, showers and washing machines flows into the septic tank where solid matter settles to the bottom of the tank while liquid waste moves through the half wall into the second chamber. In the tank, naturally occurring anaerobic bacteria work to digest and break down the solid waste. The liquid waste, known as effluent, exits the tank into the drain field where filtration, help from soil and helpful microbes treat the water before it returns to the groundwater supply.

Most septic tanks are made from concrete or heavy plastic and have two chambers. They are typically buried in the ground and can range in size from 1,000 to 2,000 gallons. They can be located on or off the home and may be in a location with a low groundwater table, such as a wetland or a sandy or clay soil.

In addition to the bacterial digestion process, the septic tank also works to remove certain contaminants, such as nitrogen, phosphorus and disease-causing pathogens. The septic tank is also equipped with a vent that lets gases escape. Often, these gases are hydrogen sulfide (which smells like rotten eggs).

As the bacteria in the septic tank work to break down the contaminants, they produce methane and other byproducts. These gases must be vented to prevent a buildup of pressure that could stop or reverse the flow of wastewater. These gases are typically released through a vent pipe that has a mushroom shape and can be fitted with a charcoal filter to reduce odors.

Homeowners should be mindful of what they flush and only send toilet paper and human waste down the drain. Putting cooking oil, non-flushable wipes (such as baby or makeup removal wipes), diapers, feminine hygiene products, cat litter, cigarettes, pharmaceuticals and paint and paint thinner down the drain can clog lines.

Another important task is ensuring the septic tank is pumped regularly. This is generally done about once every 1 to 3 years, depending on usage. A sign that the septic tank needs emptying is a bad flush or a smell.

How Do I Maintain a Septic Tank?

All of the wastewater that exits your home goes through the septic tank, including all shower water, washing machine and dishwasher water and every flush of a toilet. Wastewater carries bacteria, viruses and parasites that can lead to a variety of health problems, such as hepatitis, typhoid fever and dysentery. In addition, the nitrates and phosphates found in the wastewater can contaminate local water supplies and cause conditions like blue baby syndrome, in which newborns are unable to receive oxygen in their bloodstream.

There are a few things that you can do to help keep your septic tank healthy and working well. The first is to limit the amount of water used in your home. This can be accomplished by using shorter showers, shorter dishwashing sessions and doing laundry less frequently. A second thing is to eliminate the use of chemical cleaners and toxic solvents in your home. These chemicals can kill helpful bacteria in your septic tank and drain field and can clog your septic system.

The third thing is to have your septic tank pumped regularly. Depending on the size of your septic tank and the number of people living in your home, you may need to have it pumped every two to five years. When you have the septic tank inspected, look at the levels of sludge and scum to determine whether or not it’s time to get it pumped.

Avoid putting septic tank additives into your septic system, as they may harm the helpful bacteria and can be expensive in the long run. Additionally, septic tank additives don’t reduce the need for routine pumping and can actually increase your need for regular cleaning and maintenance.

Finally, when working on your septic tank, be sure to wear gloves and work in an area with good ventilation. It’s possible that you’ll need to lean over the opening, and it could be dangerous to do so without proper protection. In addition, never smoke near your septic tank or around the area where it’s located as the contents of your septic tank can emit explosive gases.

When Should I Have a Septic Tank Inspection?

Having a septic tank inspection before you buy a home is always a good idea. You need to know if the system has ever been pumped and how long since it was last done. You also need to know the condition of the drain field, which is where wastewater is filtered and absorbed into the ground. If the soil is poorly drained, it could cause the tank to overflow or the wastewater to back up into the house.

A septic system that isn’t working properly poses health hazards for the people living in the home and can contaminate nearby water sources. Regular inspections can help you prevent problems that could lead to costly repairs.

How often you need a septic tank inspection depends on factors like household size and the amount of water used. Larger households generate more wastewater, so they might need inspections more frequently to ensure the system is able to keep up. You should also schedule an inspection if you notice any unusual odors in your home or yard, a clogged toilet or drain, or wet or soggy soil near the tank or absorption field.

During a septic tank inspection, the inspector will check the sludge level to see if it’s time for the tank to be pumped. The inspector will also inspect the drain field to make sure it’s functioning properly. If the leach field isn’t absorbing the effluent, it may be due to a clog or a problem with the distribution box.

The inspector will test the flow of wastewater through the septic tank and into the drain field using a probe. If the probe holes fill with water too quickly, it’s likely that there is a problem in the leach field.

A septic tank inspection can help you avoid expensive repairs, so it’s worth investing in one. In addition, a regular inspection can help you extend the life of your septic tank and reduce environmental harm. Avoid dumping waste into your septic system, and don’t build structures, like decks or swimming pools, over the tank and other components of your septic system.

Home Services

Pest Control and Your Health: Minimizing Risks

Pest Control consists of techniques to reduce and manage pest populations. It’s generally used in outdoor areas. It is usually based on prevention and suppression, although eradication goals may be appropriate in certain situations.

Get rid of clutter that provides places for pests to hide and breed. Use barriers to prevent pests from entering buildings. Click here to Learn More.

Pests are more than a nuisance; they can cause health and structural damage to homes and businesses. Knowing what pests are common around your house or business and the options available for controlling them can prevent them from becoming more than a minor annoyance.

Prevention is the first step in pest control, and it includes removing all sources of food, water, and shelter. It also means periodically cleaning out storage areas and fixing leaky plumbing, among other things. Food can be stored in smell-blocking containers, garbage should be removed regularly, and the roof should be checked for cracks and other openings where pests could enter.

In many cases, preventing pests from becoming a problem requires a combination of methods, such as bait traps for rodents and spraying for insects. Poisons, either in granule form or as gel in traps, are also often used. Poisons are absorbed by the pests and, depending on their concentration, can kill them or disrupt their normal body functions.

Integrated Pest Management, or IPM, is an approach to pest control that begins with learning about the specific pests and their life cycles and then takes a broad range of steps to reduce the chances of them causing problems. This can include preventing access to their nests, destroying them, or keeping them from entering buildings or other structures.

Other strategies include eliminating their shelters by sealing cracks and crevices, as well as repairing any damage they may have done. In some cases, removing woodpiles from the perimeter of your home or business and trimming grass or other shrubbery can help deter some pests.

Pests also can be controlled by using predators, such as birds and reptiles, to feed on pests and reduce their numbers. Biological controls can also be used, such as using pathogens to inhibit the growth of plants that pests depend on for food or by introducing organisms that will compete with them for resources. Other options include crop rotation and soil amendments to modify the conditions that favor pest growth.

Suppression

Pest control must be based on a risk assessment that defines the levels of damage below which harm is tolerable. It must be carried out with as little damage to nontarget organisms (including humans, animals and other plants) as possible, and should cost less than the economic value of the crop destroyed by the pests.

Many different kinds of natural, biological, chemical, cultural and mechanical controls can be used to reduce pest populations. These include natural barriers, such as mountains or lakes; climate conditions that limit the distribution of pests by restricting their food supply, water sources, or shelter; and the presence or absence of predatory species or pathogens.

Some pests are controlled naturally by living parasites, predators and competitors, as well as nematodes, viruses and bacteria. These are known as “natural enemies” or “biological control.”

In most cases, the natural enemy population grows and declines along with the pest population. When there is a sudden change in the environment that causes the number of natural enemies to increase, the population of pests will decrease.

Other pests, such as weeds, are controlled by chemical or physical methods. For example, weeds may be killed by spraying with herbicide, pulling by hand or using a hoe. Traps are another common way to trap unwanted pests, such as cockroaches, by baiting them with a substance that lures them and then kills them. Traps are usually placed near the entrances to homes or in areas where pests tend to roam.

Other ways to manipulate the environment to discourage pests include modifying the landscape by blocking their access to food, water and shelter; and keeping soil moisture, nutrition and other factors suitable for desired plants. Cultural controls, such as preparing the soil before planting; choosing plants that are adapted to site conditions; interplanting; timing planting dates; and managing weeds can also help suppress pest problems. Some of these controls, such as trapping and blocking a pest’s route, work best when the pest’s movements are predictable. This allows you to place more of a focus on the most important parts of its territory.

Eradication

A pest infestation can be a serious health and safety issue. In some cases, the pests may carry disease and cause structural damage. In others, they can be a nuisance or irritate people. In any case, it is important to take action to prevent and eradicate a pest problem. Using nonchemical pest control methods is the best way to solve a pest problem safely. Before you call the pest control company, do a little research to find the right solution for your situation.

The terms exterminate, extirpate, and uproot have similar meanings. They all mean the complete destruction of something that has already established itself in a location. Eradication is usually a long-term process that involves multiple steps, including assessing the extent of the infestation and the risk of health or safety issues.

Many pests can be prevented by maintaining a healthy environment. This includes cleaning up debris piles and removing tall weeds. It also means trimming plants and keeping woodpiles away from the house. This can keep pests from finding a food source or water supply in these areas. In addition, a well-maintained garden will provide natural predators for pests.

If you are planning on using chemical pesticides, be sure to follow all the safety precautions that come with them. These chemicals can be dangerous for humans, animals and the environment. They can also damage other crops, pollute groundwater, and harm honey bees. Chemical pesticides can also leave behind residual toxins that poison wildlife and humans and cause other health problems.

When used properly, a chemical pesticide can be an effective way to eliminate pests from a home or commercial facility. However, it is important to consider the long-term consequences of this approach. If the same type of chemical is repeatedly used, pests can become immune to it and re-infest the area.

A natural pest control method can be a more cost-effective option for eliminating pests. This method uses organic ingredients, which is better for the environment and your family. It also doesn’t leave any toxic residues in the environment. It is also safe for children and pets, so it is a good choice for families who want to avoid harsh chemical pesticides.

Monitoring

Pest control is a multifaceted approach to cleaning and maintaining places like homes, agricultural areas and food businesses. The goal is to eliminate or reduce the impact of organisms that interfere with human occupancy, activity, and territorial paths, and transmit diseases to humans and animals. These organisms can include bacteria, fungus, birds, weeds, rodents, invertebrates such as mites and ticks, insects, spiders, and more. Integrated pest control is a method that utilizes several techniques and approaches to keep pest populations under control without using excessive amounts of pesticide.

Monitoring is an important part of any pest control program. Inspecting sites regularly with a variety of tools can identify pest hotspots and allow for more targeted monitoring and trap placement. Keeping a log can also be beneficial in analyzing data and providing insights into the type of pressure you are experiencing and from what direction the pests are coming.

Often, the most useful tool to have at hand is a good flashlight, as many pests live and hide in dark or secluded spots. An extendable mirror can be extremely helpful in inspecting behind and beneath equipment or other hard-to-reach places. It’s also a great idea to have a magnifying glass, as it allows for the more detailed inspection of insect parts, frass (excrement), and other signs of pest presence.

When it comes to monitoring, the goal is to determine whether a pest population has reached an unacceptable level. Suppression and prevention are common goals in outdoor pest situations, but eradication is sometimes attempted, especially for foreign pests such as Mediterranean fruit flies, gypsy moths, or fire ants. In indoor spaces, eradication is rarely the goal due to the complexity of enclosed environments and the difficulty of eliminating all pests from an area.

Pest monitoring can also reveal structural issues, sanitation deficiencies and employee behaviors that may be contributing to a problem. Glueboards and multiple catch traps can be augmented with attractants or pheromones to increase capture rates, and many monitors are designed to detect specific pests and their life stages. For example, a German cockroach monitor will alert you when the first instars of these pests are captured.

Home Services

Stucco Repair and Stucco Remediation

Stucco Repair Philadelphia PA is an important service to your clients as it helps maintain their home’s aesthetic integrity and value. While a few cracks are part of normal wear and tear, large cracks and holes may signal more serious problems like foundation settling or water damage.

It’s important to have your stucco repaired by an experienced professional. Inspecting the stucco with a moisture meter can help identify the cause of damage and provide information to your client for remediation.

Water damage to stucco is a common issue many homeowners have to deal with at one point or another. Moisture intrusion into the wall system is not only unsightly. Still, it can lead to some problems for your home, including health-related issues, mold, and even structural damage that may necessitate replacements.

There are a few key things to look for to help you determine whether your stucco has been damaged by moisture. One of the first is water stains that appear on your stucco. These stains will be gray, green, or brown and will likely be visibly obvious on your home’s exterior.

If you notice these stains, it is important to contact a stucco contractor to have them repaired as soon as possible. This will prevent further damage to your stucco and help protect your home from water intrusion in the future.

Another common sign of moisture damage to stucco is mold or mildew. This is usually accompanied by a musty or moldy smell and will also require immediate action. Mold and mildew can have a very negative impact on your family’s health, so it is important to address the problem as quickly as possible.

Other signs of moisture damage to your stucco include leaking around windows or doors and gaps in the caulking. This is a good indication that the window frames and surrounding stucco have been compromised by moisture and should be examined for further damage and possibly replacements.

There are two main factors that influence the cost of a stucco repair or remediation. First, the inspection and moisture testing costs must be factored in. These tests can involve inserting probes into the suspected areas of your stucco to measure the moisture content within the wall system. This is an essential part of determining the cause of any moisture intrusion and can often be done by a certified stucco professional.

Second, the actual cost of repairing or replacing your stucco will depend on the extent of the damage. Stucco repairs are more likely to be cheaper than a full remediation, as they only focus on fixing the surface level of your home’s stucco. Remediation is a much more involved process and will involve addressing any underlying issues that are causing your stucco to fail.

Indentation or Soft Spots

Stucco is a very popular exterior home finishing material and has become a standard feature on many new homes. It is a beautiful and durable material that can stand up to the elements, but it’s important for homeowners to know the warning signs of stucco problems. Some of the most common warning signs include cracking, water damage, and staining. If you notice any of these issues on your home’s stucco walls, it may be time to call a professional to perform a simple stucco repair or complete a more comprehensive stucco remediation.

If you notice cracks on your stucco wall, you’ll want to check the size of those cracks. Hairline cracks are fairly normal and not a significant cause for concern, but cracking that is wider than a quarter of an inch could indicate that there is a serious structural issue with your home’s foundation.

If your home’s stucco has begun to degrade, it can cause the underlying wood to rot. This can lead to a number of different issues for your home, including the need for a complete wood replacement. Another major problem is that rotted wood can create moisture issues, which may lead to further problems with your stucco.

The most obvious sign of a failing stucco finish is cracking. However, you also need to keep an eye out for stains and blistering. Staining can appear as brown streaks under windows or at the intersections of the roof and walls, while blistering is visible when the top layer of the stucco begins to peel away.

In order to repair a cracked or soft spot, you’ll need to use a hammer and chisel to loosen the old stucco. Then, you’ll need to remove the loose sections and clean out the area. Next, you’ll need to mix the appropriate amount of elasomeric or premixed stucco patch per its instructions and fill in the damaged areas. Once the patch has dried (following the recommended dry times), you’ll need to smooth it out using a rubber float and blend it into the existing texture of your stucco.

Cracks or Holes

Stucco is a popular wall-building material for both homes and commercial buildings because of its durability and attractive finish. However, it’s not immune to damage over time from weather and physical impacts. Hairline cracks are common and often easy to fix using joint compound, but larger holes require more comprehensive repair techniques to prevent future water intrusion and further damage.

Whether your stucco is damaged by a small hole or widespread cracks, the first step in repairing them is to remove any loose material from the affected area. Then, clean the void and dampen it slightly to ensure a good bond for the new stucco. Next, use a wire brush to scrub away any remaining debris and dirt that might hinder adhesion, and then scrape off any old flaking stucco with a hammer and chisel, being careful not to damage the surrounding structure.

After cleaning the void and dampening it, you’ll need to apply some fiberglass mesh over the entire surface. Then, you can begin to patch the holes. For smaller holes, you can use a standard caulk gun to apply stucco repair compound directly over the hole. Once the caulk has been applied, use a trowel to smooth it out and match its texture to the surrounding wall finish. Then, allow it to cure for 24 hours before painting it with a water-based paint that matches your home’s exterior color.

For wider cracks, you’ll need to follow a similar process but with the addition of a foam core. The foam is used to create a stronger base and fill the cracks before applying the stucco. This is necessary to ensure that the cracks won’t open up again later and cause more structural damage to your home.

Once the cracks have been filled, you’ll need to apply a second layer of stucco over it to provide additional strength and protection from moisture. When this is done, it’s important to let it cure completely before painting so the elasticity of the foam will not interfere with the ability of the new stucco to hold its own against precipitation.

Remediation

Remediation is more in-depth than a repair and usually involves stripping away all the stucco layers to find the source of the moisture penetration. This is more expensive, and it can take longer than a simple repair, but it’s the best long term solution. It also fixes the problem for good and prevents moisture intrusion from happening again.

If you have a water damage issue, it’s important to have it remedied quickly and thoroughly. Otherwise the moisture can eat through the sheathing and framing, cause rot, and lead to mold growth. Mold is toxic and can exacerbate allergies and other health problems, so removing it as soon as possible is crucial for your family’s well-being. In addition, if left untreated the mold can spread to other parts of the home, such as drywall and ceilings.

Stucco damage is a serious concern, and it can impact the overall value of your home. Whether your stucco is damaged from flooding or simply old and starting to wear down, it’s important to have it inspected and repaired promptly. Doing so will save you money on costly repairs and maintain the integrity of your home’s structure.

One of the biggest signs that your stucco needs remediation is blistering and blooming. This occurs when water seeps through the stucco into a space behind it and becomes trapped. It can then start to rot the sheathing and framing, which could threaten the structural integrity of your home.

Blooming and blistering can be caused by a variety of issues, including improperly installed expansion joints, base coats that are applied before the stucco is fully dry, and poor construction practices. In some cases, a house that is settling faster than expected or seismic activity can lead to blistering and blooming as well.

Stucco repairs are typically much cheaper than remediation, but if you have an underlying issue that needs to be addressed, it may be more economical to pay for the full remediation process. A good professional will be able to advise you on the right service for your home.

Home Services

Home Repairs You Can Do Without a Full Roof Replacement

If water seeps through shingles, look for rotted wood or dark mold on the underside of the roof sheathing or rafters. Look also for leaking roof vents and loose or missing flashing around them.

Dents in a metal roof are easy to spot, but leaks aren’t. Repairing a roof is much like feeding animals in a zoo—you need to know what to look for and when to do it. Contact Denver Roof Repair now!

Shingles defend your home against the elements, protecting your walls and ceiling from moisture infiltration. A damaged shingle weakens this barrier, paving the way for leaks and deterioration that can lead to costly repairs. If you catch the problem early enough, you can repair a single shingle without needing a full roof replacement.

Start your inspection by getting up into the attic or crawlspace, depending on what’s easiest for you. Take a flashlight and a tool belt with you so you’ll have all the tools you need close at hand. Take high-resolution pictures of the area and document anything that’s out of the ordinary.

After carefully examining each shingle, begin by removing the damaged one. Use a shingle pry bar to gently lift the shingles and reveal the nails beneath, then pull up the damaged shingle and any loose shingles. Once the shingle is removed, pry up the shingles below it and use a utility knife to cut away the nails that were previously nailed down. Next, slide a new 3-tab shingle into place and nail it down with four roofing nails.

Once you’ve removed any loose shingles, reseal the edge of each one with shingle cement. Apply a thin line of the substance under the edges of each shingle and press down to firmly secure it into place. Work your way down the row, resealing and nailing each shingle as you go.

While a single torn or missing shingle can be easily replaced, you should also keep an eye out for more widespread damage. Cracks and creases in your shingles are typically caused by a combination of wind and exposure to the sun’s UV rays, and they can eventually compromise the integrity of your entire roof. Look for other signs of shingle distress, including dark spots and streaks that are indicative of algae or moss growth. Loose or damaged flashing can also indicate a serious problem, and it’s important to pay attention to any areas around chimneys, vents, and skylights.

Damaged Flashings

Flashing is a metal, lead or rubber moulding that’s laid along a joint in roof components and helps to channel rainwater away from the roof, protecting it from internal water damage. Flashing is usually installed around penetrations like chimneys, dormers and roof windows and in areas where the roof slopes meet at valleys or intersections. Flashing can also be found near skylights and vents. It’s important to inspect and maintain these elements of your roof because leaky flashing can cause serious problems, including structural damage, wood rot and internal water damage.

There are a few common signs that your flashing needs repair, such as visible damage, dampness in the interior and leaking. If you notice any of these issues, it’s a good idea to contact a roofing expert to get on the roof and evaluate the damage. They will be able to recommend the best course of action and let you know what repairs need to be made.

Visible damage to your flashing can be caused by rust or cracks in the surface. The most common cause of flashing damage is a leaky roof. This can happen when the flashing is not properly protected or is in a poor condition to start with. Flashing is often exposed to extreme fluctuations in temperature and can be weakened by poor installation or if the roof’s plans were unavailable.

Leaks from faulty flashings can be very destructive and lead to major roof problems, such as rotted framing, sheathing and insulation. It’s essential to have a professional roofer inspect the roof and its components, especially the flashings, on an annual basis. This will ensure that any small issues are identified and repaired quickly, preventing bigger problems down the road.

When repairing or replacing flashing, it’s important to use the right materials and tools. It’s also important to be aware that working at heights is dangerous and requires specialized knowledge and equipment. It’s a good idea to hire a roofing contractor with experience in dealing with flashing repairs and other complex roof designs, as they will have the tools and expertise to safely and efficiently complete your repair.

Damaged Gutters

Gutter damage is a serious roof problem that should never be ignored. Without functioning gutters, rainwater can build up on the side of your house, seep into shingles, siding, and even the foundation. When this happens, moisture can wreak havoc on your home, leading to rotting wood, mold growth, and other costly problems. The best way to avoid these issues is by regularly cleaning and inspecting your gutters and repairing them as needed.

Damaged gutters are often caused by clogging, which occurs when leaves, twigs, and seeds accumulate in the gutter. Over time, this can cause the gutter to become warped and heavy, which leads to it becoming detached from your roof. Gutter deterioration also occurs when water is not properly drained away from your home, which can lead to rot and erosion.

When your gutters are damaged, it is important to repair them as soon as possible to prevent further damage to your roof and home. To repair your gutters, start by removing any moss or other plant life that has grown in them. This will help to reduce pressure and block water flow. You can also check for any cracks or holes in the gutters and make sure that they are properly sealed.

The next step is to fill any holes or cracks in the gutters with roofing cement. To do this, mix a small amount of cement, and apply it to the hole with a putty knife. Once the area has been patched, let the cement dry completely before reattaching the gutter.

Leaks can also occur in gutters, which are most commonly caused by disconnections between sections and downspouts. This can be fixed by re-connecting the disconnected parts and plugging any gaps in the gutter system.

You can also repair leaks in gutters by using a special gutter sealant. This is available in a caulk-like tube, and it is used to fill the gap and seal the leak. If you notice that there is a lot of damage to your gutters, it is important to call in professionals to handle the repair as soon as possible. If you don’t do this, you may experience further damage to your roof and home that could cost you thousands of dollars in repair costs.

Damaged Soffit

The soffit serves a variety of purposes, including shielding the attic from moisture and hiding the roof overhang. It also promotes attic ventilation, which can help maintain good air quality in the home. Unfortunately, the soffit is also one of the many areas of the house that is susceptible to damage from pests and other issues. Luckily, these problems can often be fixed without the need for a full roof replacement or extensive home repairs.

Moisture buildup from damaged soffits can lead to rot and other serious structural issues. In addition, it can fuel mold growth, which poses health risks for occupants of the home and contributes to allergies and respiratory problems. Regular inspections of the soffit are essential for homeowners and roofing contractors, allowing them to identify signs of damage and take action quickly before it worsens.

Aesthetics: A soffit that is in poor condition gives the house a dingy appearance and can lower its resale value. It can also be a breeding ground for rodents and insects, which in turn can cause further damage to the property. Timely soffit repair prevents these issues from becoming major problems that require costly home renovations.

Damaged soffits also provide an entry point for unwelcome pests, such as squirrels, birds, mice, and bees. These animals like to build their nests in small gaps that aren’t easily accessible. This can put pressure on the soffit panels and allow them to deteriorate faster than they would otherwise. In addition, the presence of these pests in the attic can cause further damage to the structure and create a host of other problems for occupants.

To start:

  1. Inspect the soffit for damage and rotting.
  2. Look for shingle mold, a drooping soffit, and a rotting fascia board.
  3. Remove the shingle mold and fascia boards by prying them up with a flat bar and pulling them away without damaging nearby roof shingles or flashing.
  4. After removing the damaged materials, install new ones to prevent further damage and ensure proper attic ventilation.
  5. Install a wood trim or molding to the soffit to give it a finished appearance.
Home Services

Negotiating Contracts For General Contractors

GCs work to bring a client’s vision for their home renovation to life. This may include executing plans developed by other professionals, such as engineers or interior designers.

Large construction projects often require the movement of a large number of raw materials and building components. GCs oversee the entire supply chain management process to ensure it remains streamlined. Click the Website to learn more.

Contract negotiation is developing an agreement with a partner over terms such as price, delivery schedules, or terms and conditions. General contractors often negotiate with various parties, including project owners and subcontractors. Getting to an agreeable contract takes time, skill, and flexibility. There are many different strategies to consider when negotiating a construction contract, and it is important to understand the motivations of each party to find an effective solution.

It is common practice for project owners to invite multiple bids from various contractors on a commercial building project. The bidding process may produce a lower final price, but it can also lead to numerous change orders that drive up costs and project delays. Ultimately, the quality of the general contractor chosen is one of the most important factors in project success.

To mitigate the risk of costly change orders, it is vital that all stakeholders work together to negotiate a fair contract. This begins before the contract award, and requires thorough understanding of the project scope and its limitations.

The most important goal of contract negotiations is to establish a level of certainty about the project deliverables and what is expected from each party. This includes clearly defining the roles and responsibilities of each party, along with how changes will be managed and dispute resolution processes.

One strategy to help both parties achieve their goals is to involve a neutral third party. This can offer fresh perspectives and encourage more constructive dialogue. It can also help to overcome impasses that would be difficult to resolve independently.

For example, a common issue in construction is the conflict between the contractor and the owner over the amount of warranty coverage. It’s important for both parties to be clear about the duration and scope of warranties, as well as the responsibilities of each party for managing claims.

Other critical elements include establishing a clear schedule for payments, and providing for proper documentation of invoices and receipts. It’s also crucial to avoid misunderstandings about the scope of work by carefully labeling repairs. Careless language can impact lien rights and the ability to request additional payments for delay damages.

Sub-Contractors Management

As a key component of the construction team, subcontractors are responsible for executing specialized scopes of work that impact project timelines and overall outcomes. As a result, GCs must manage these partners to ensure that their work is aligned with the overall vision of the project and to deliver high-quality results.

To do this, GCs must create an environment that fosters open communication channels, which are essential for building a mutually beneficial working relationship. This includes establishing clear timelines, milestones and deliverables for each project phase. By doing so, GCs ensure that all parties understand their responsibilities and can address issues promptly.

Managing subcontractors also involves establishing and monitoring financial processes. For instance, GCs must regularly compare budgeted costs against actual expenses to prevent unwarranted cost overruns. To further manage costs, GCs should also encourage collaboration with subcontractors to identify potential cost-efficiency measures.

Additionally, GCs must regularly assess performance in terms of schedule adherence and quality of work. This is done through regular inspections and a system that enables a standardized evaluation of each subcontractor. This provides a means to quickly address challenges and ensure that they are addressed in a timely manner, which helps keep the project on track.

In addition, GCs must be transparent about the project and provide detailed information to subcontractors so that they can plan their work accordingly. It is also important that GCs get all agreements in writing. This will help in case there is a dispute or the contract is breached.

Finally, GCs must make sure that they have an effective process for handling change orders and revisions to the original scope of work. This is vital for ensuring that the project stays on target and does not incur any additional cost or delay. Furthermore, GCs should ensure that they provide proper notifications to the client if there are any changes to the original scope of work. Failure to do so can result in disputes and claims that can be detrimental to the project. In addition, it may cause delays in project delivery which can be costly to the client.

Client Relationship Management

When it comes to client relationship management, many general contractors are reluctant to invest in a CRM solution. This may be due to the high cost associated with industry-agnostic software and the time investment in learning how to use it. A construction-specific customer relationship management (CRM) solution is ideal for GCs because it is built with their business development needs in mind and can be used out of the box, without the need to customize it further.

The key to building and maintaining strong relationships with project owners is consistent communication throughout the project. This ensures that the project is progressing as planned, and helps to minimize issues and disagreements. It is also important to provide regular updates on schedule, budget, and quality.

In addition, it is helpful to have a strong website that reflects the GC’s expertise. A website that is optimized for search engines is critical to attracting clients and generating leads. A good site can also be used to share case studies, videos, photos, and testimonials, which are all excellent tools for promoting the GC’s services.

The most successful GCs understand the importance of cultivating repeat business. A large percentage of a GC’s revenue can come from referrals from past projects. This means that the GC must focus on consistently delivering a great experience for each client, regardless of whether they are a new or returning customer.

Keeping clients happy can be achieved through clear communication throughout the entire project life cycle, especially during the onboarding process. This is an opportunity to set expectations for how often the GC will communicate and who is responsible for communicating with the client.

A successful GC will have a contract in place that clearly outlines roles and responsibilities of both the GC and the owner. This includes clauses on how to manage change orders, claims, and payments. It is also essential to include a statement on how the GC will communicate with the owner during the construction phase.

A few examples of CRM solutions that work well for GCs include Jobber, AccuLynx, and ConstructConnect. Jobber focuses on job quoting and offers robust project management features to oversee full construction or remodeling projects. AccuLynx is an all-in-one solution that provides a complete client relationship management platform with sales pipeline, project and production management, communication, estimating, workflows, and material tracking. It also has unique finance tools like job quoting and costing to help GCs with profitability.

Project Management

Project management is a systematic professional application of processes that leads teams to complete projects on time and at an acceptable quality. This requires the coordination of different resources that may be needed to complete a task such as equipment, tools, labour, money and time. This involves ensuring that the tasks are planned, executed, monitored and controlled effectively so they are completed on time and within budget.

Project Management Software is an excellent tool for construction professionals to manage and communicate with team members and stakeholders. It helps to improve productivity and collaboration, reduce risk, and increase quality. It also improves organizational effectiveness by aligning projects with business goals.

Choosing the right project management software is important for the success of your company. It has to be easy to use and offer the features you need. It should also be affordable. In addition, you should look for a system that is secure and supports the latest project management best practices.

A General Contractor is a professional who oversees and manages large projects and complex operations. They are often responsible for the entire construction process, including planning, design, financing, and building physical facilities. They hire subcontractors, like plumbers and carpenters, to perform specialized work on site. The general contractor is credited with ensuring that the construction is done correctly and on time.

Construction managers are often brought in during the design phase of a project to provide constructability input. They can help with planning, securing any required permits and regulatory approvals, developing a cost estimate, shaping a procurement strategy, evaluating potential subcontractor partners, and negotiating contract terms and conditions.

They can also assist in the management of change orders and schedule updates, and can help to define scope and budgets. In some cases, the CM can act as a liaison between the GC and the client to ensure that expectations are met.

Some owners choose to bring in a CM for larger projects or projects that will span a longer period of time. This can be a great way to control costs by protecting the owner from cost overruns. This is often accomplished by using a guaranteed maximum price (GMP) contract, where the contractor agrees to a maximum price for the project and absorbs all cost overruns.